

2 Get Started - Reference Documentation
Authors: Martin Schimak
Version: 0.5.0
Table of Contents
2 Get Started
2.1 Install the plugin
In your BuildConfig.groovy configure the following plugin dependency:plugins {
compile ":camunda:0.5.0"
}grails refresh-dependencies
2.2 Create a process definition
You can now create a BPMN 2.0 process definition by issueing the following command:grails create-process [name]
| Created file grails-app/processes/org/camunda/my/TestProcess.bpmn
| Created file test/integration/org/camunda/my/TestProcessSpec.groovy
 Furthermore you will find a 'spock' based integration spec executing and checking that process. It
does have a bit more content than your typical almost empty Grails spec template...
Furthermore you will find a 'spock' based integration spec executing and checking that process. It
does have a bit more content than your typical almost empty Grails spec template...[...] given: "a new instance of TestProcess" runtimeService.startProcessInstanceByKey("TestProcess")when: "completing the user task" def task = taskService.createTaskQuery().singleResult() taskService.complete(task.id)then: "the service method defined for the subsequent service task was called exactly once" 1 * sampleTestProcessService.serviceMethod(_ as Execution) [...]
2.3 Execute the integration test
Beware that this test will populate your test environment database with camunda related tables. By default, this will be a H2 in memory database preconfigured by Grails - so everything fine with that. For other databases, you will need to adapt the plugin configuration, too.
grails test-app integration: org.camunda.my.TestProcess
| Running 1 integration test… 1 of 1
| Completed 1 integration test, 0 failed in 0m 0s
| Tests PASSED - view reports in ./target/test-reports
2.4 Wanna see camunda BPM in action?
Do you want to see the camunda BPM tasklist and cockpit web apps in action with your freshly created process? Then download a camunda BPM distribution for tomcat, expand the archive, go to the expanded folder and start it by issuing:./start-camunda.sh
grails war
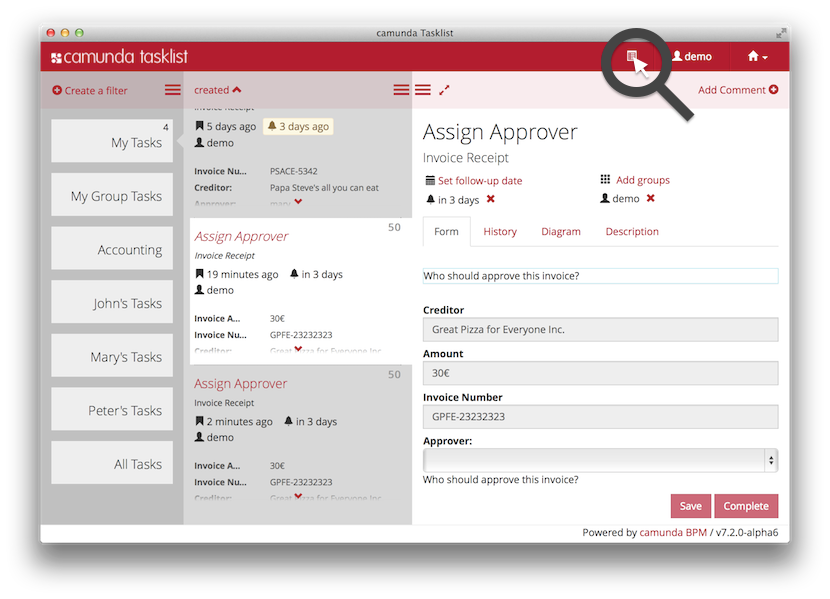 The sample form shows you different types of fields. You must at least select one of the values
in the 'sampleRequiredSelectionField' in order to validate the start form and enable the
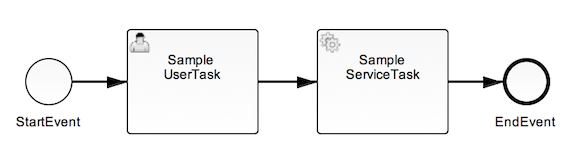
"Start"-Button. Start the process and you should see the "Sample UserTask" of your process
assigned to you as user "demo". You may want to check out the diagram pane of your process and then
complete the task via the form. This will execute the subsequent service task (which logs
the process variables provided by you into your tomcats logs/catalina.out file) and immediately
after that finish your process instance.
The sample form shows you different types of fields. You must at least select one of the values
in the 'sampleRequiredSelectionField' in order to validate the start form and enable the
"Start"-Button. Start the process and you should see the "Sample UserTask" of your process
assigned to you as user "demo". You may want to check out the diagram pane of your process and then
complete the task via the form. This will execute the subsequent service task (which logs
the process variables provided by you into your tomcats logs/catalina.out file) and immediately
after that finish your process instance.
